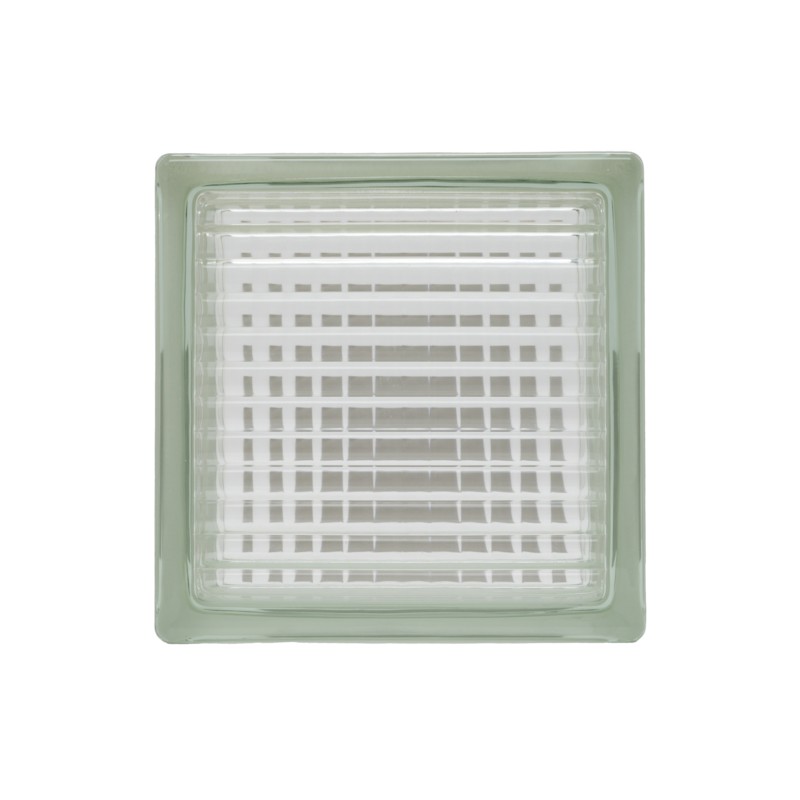
Product Rich Media production—not equipment, software or a syndication platform. Send us the product. We create the visual assets.
Materials & capture planning
360 Product Photography for Glass and Transparent Products
Glass, clear plastic and translucent components can be difficult to describe online because the customer is trying to evaluate both the product and the material. The right 360 Product Photography approach makes edges, wall thickness, openings, molded features and internal construction easier to understand without making a transparent product look opaque.
Start with the product
Transparency is a product attribute, not a special effect.
Manufacturers use glass and clear materials because seeing through the product matters. A bottle may need to show fill level and closure construction. A molded polycarbonate guard may need to reveal mounting points and wall thickness. A laboratory component may need to show ports, chambers or graduation marks. A lighting product may combine clear lenses, frosted diffusers, reflective components and finished hardware in one assembly.
360 Product Photography should preserve those material characteristics while giving the buyer a useful inspection experience. The objective is not to make the product dramatic for its own sake. The objective is to communicate the shape, finish, construction and functional details that affect specification, purchase, installation or use.
Why these products are difficult
Clear materials show the product—and everything around it.
Transparent and translucent products respond to their environment differently from opaque products. A clear surface may be defined primarily by transmitted light, reflected edges and changes in the background behind it. Curved glass can magnify, compress or distort internal components and whatever sits beyond the product. The camera position, background transitions and edge lighting must work together without falsely making the material appear opaque.
That creates a production problem as much as a photographic one. A single still can be adjusted until it looks right from one angle. A 360 Product Photography sequence has to remain believable through the entire rotation. Edge definition, highlight movement, background tone, tint and internal details need to hold together as the product turns. Products that combine clear and polished surfaces may also benefit from the methods described in our reflective product photography guide.
The material description also matters. “Clear” may refer to glass, acrylic, PET, polycarbonate, resin, a coated optical component or a molded assembly containing several materials. Frosted, smoked, tinted and translucent products require different decisions. Surface texture, wall thickness, curvature, seams, embossed marks, labels, contents and internal parts all affect the capture plan.
The production questionCan the approved treatment preserve clarity, tint, edges and internal construction across every frame, SKU and product variation?
Define the customer need
Show what the customer needs to verify.
The most useful treatment begins with the buying, specification or installation questions surrounding the product.
Overall form and scale
Customers may need to understand the silhouette, proportions, openings and relationship between clear and opaque components. A clean single-row 360 often provides enough information when the important features are distributed around the sides.
Edges, thickness and molded features
Wall thickness, ribs, bosses, channels, threads, seams and molded markings can disappear without deliberate edge separation. For engineered products, these features may be more important than the material’s visual appeal.
Internal construction
Transparency may allow the customer to inspect internal parts, chambers, filters, fasteners or fluid paths. The capture should make those features readable without creating so many overlapping reflections that the assembly becomes confusing.
Surface finish and optical behavior
Clear, frosted, prismatic, smoked and tinted materials should not be presented as interchangeable. The imagery needs to preserve the actual finish and avoid implying a level of transparency or color that the manufactured part does not have.
Labels, graduations and product identification
Printed graphics, etched marks, measurement scales, warning labels and model identification must remain legible where they affect selection or use. That may require additional stills even when the primary deliverable is an interactive 360.
Establish the standard
Approve the material treatment before volume capture begins.
For a product family or catalog program, PhotoSpherix starts with one or a few representative SKUs. The sample set should include the material and construction variations most likely to change the photography: clear and tinted versions, different wall thicknesses, printed and unprinted parts, assembled and unassembled configurations, or products with different internal components.
The approved sample establishes more than a preferred angle. It defines product orientation, starting frame, rotation direction, frame count, background, crop, scale within the square canvas, edge treatment, label visibility and supporting stills. It also gives the manufacturer an opportunity to confirm that critical features are visible before dozens or hundreds of products move through production.
Physical preparation should be treated as part of the specification. Glass and polished plastic reveal dust, fingerprints, residue, protective-film marks and handling scratches quickly. The project plan should identify whether products arrive production-clean, whether protective film remains in place for shipping, who approves removal, and how defects or sample damage should be documented. PhotoSpherix can clean normal handling marks, but photography cannot turn a damaged sample into an accurate representation of a sellable part without additional retouching decisions.
Fixtures and supports also require planning. Some products can stand or rotate on their normal base. Others need temporary supports, suspension or assembly-specific positioning. When support removal is required, it becomes a repeatable post-production step that must remain consistent through the full 360 Product Photography sequence.
Choose the useful view
Single-row, multi-row or supporting stills?
A single-row 360 is the practical starting point for most bottles, containers, lenses, guards, housings and clear components. It shows every side efficiently and keeps the viewer simple.
Multi-row 360 Product Photography becomes useful when top openings, underside construction, angled ports or internal geometry cannot be understood from one horizon line. Additional rows should solve a real information problem; they should not be added simply because the technology is available.
Full-resolution product stills remain valuable for markings, closures, connection points, textures and dimensional features. A strong product package may combine one interactive 360 with a controlled set of detail views rather than forcing every question into the rotation.
Transparent Product Work
See edges, tint and internal structure through the rotation
A live PhotoSpherix example selected from the Work library. Updating its classifications or status automatically updates this page.
Catalog production
Consistency has to survive product variation.
Manufacturers rarely have one perfectly identical transparent product. A catalog may include multiple diameters, heights, colors, finishes, capacities, closures and assemblies. Some SKUs may be empty while others contain filters, hardware or internal components. The photography standard needs enough structure to keep the catalog coherent and enough flexibility to handle meaningful product differences.
PhotoSpherix treats high-volume 360 Product Photography as production. Products are identified against the project list, captured to an approved standard, processed in the background, reviewed internally and published for client review. Products can be approved individually, and requested changes remain connected to the correct SKU instead of being spread across email threads.
Automation handles repeatable operations such as crop, sizing, background work, file naming and export packaging. People still make the decisions that require judgment: whether the edge reads correctly, whether internal detail is useful, whether a label is legible and whether a particular SKU needs a modified treatment. This balance is especially important for glass and transparent product catalogs because small material or construction differences can change the result.
Custom exports can follow a manufacturer’s DAM, PIM, distributor, retailer or internal file specification. The master capture should preserve useful future options while retailer-ready exports follow the dimensions, frame sequence, naming and packaging required today.
Plan the deliverables
Build the output around where the imagery will be used.
Capture decisions should connect directly to ecommerce, distribution and product-information requirements.
Interactive 360
Choose a frame count that produces smooth interaction at the intended display size without creating unnecessary page weight. The final viewer should load quickly, stop when off-screen and remain easy to operate on desktop and mobile.
Product stills
Export the starting frame and required alternate views for product listings, sell sheets, line cards, distributor portals and retailer submissions. Detail images can address information that is too small or specialized for the primary rotation.
Naming and organization
Use SKU, manufacturer part number or another approved identifier consistently. Folder structure, derivative names and delivery packages should align with the customer’s DAM, PIM or ecommerce workflow.
Review and approval
Confirm the material treatment on representative products before full production, then review completed SKUs through a product-level approval process. This reduces late-stage rework and keeps exceptions visible.
Common questions
Planning glass and transparent product photography
Can every clear product be photographed on pure white?
Many can, but “white background” does not mean the capture environment is visually empty. Clear edges and surfaces need controlled tonal separation. The final background and the product treatment should be approved together rather than evaluated as unrelated requirements.
Should the product be empty or filled?
That depends on what is being sold and what the customer needs to understand. Contents can demonstrate capacity, flow or intended use, but they can also hide internal construction and change color or reflections. When both states matter, separate SKUs or supporting views may be the clearer solution.
How many frames should a transparent product use?
The frame count depends on product geometry, intended viewer size, motion smoothness and delivery requirements—not transparency alone. PhotoSpherix recommends the simplest frame count that provides a useful customer experience and supports the required channels.
Can transparent products be included in a high-volume program?
Yes. The important step is establishing representative samples and documenting the approved treatment before volume production. Product variation, preparation requirements and exceptions should be visible in the product list and review workflow.
Start with representative samples
Show us what must remain visible through the material.
Send PhotoSpherix reference images or representative products, the SKU count, material and tint variations, internal features, intended sales channels and delivery requirements. We will define the edge treatment, useful camera movement and repeatable production standard before volume capture begins.
Start a ProjectPhotography in practice
Transparency must remain readable throughout the rotation
Lighting, position and point of view are chosen around what you, the customer, need to understand about the product.
Drag to rotate · Interactive 360